

Paper has been a huge part of our homes for a long time, so much so that our day starts with pieces of paper entering our home.
You step out of your home the first thing in the morning to pick newspaper. You get bills and receipts for buying any goods or services that make your daily life easier. You gather catalogues for products you intend to buy and magazines to keep yourself entertained. You stick post-it notes on your cupboards and fridge as reminders.
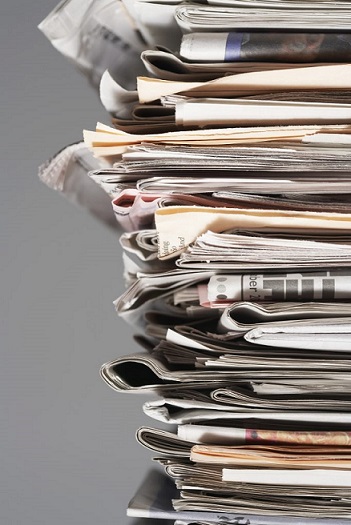
Paper occupies almost every corner of your house – drawers, cabinets, flat surfaces, bags, filing cabinet, home office. This paperwork, if left undealt with, can get out of control in no time making your house look like a paper junkyard.

This post contains affiliate links. For more information, see my disclosures.
Over the years, our family has moved from dealing with a ton of paperwork to living a paper-less lifestyle, and this has undoubtedly made our lives a lot easier. I would be lying if I say that we have managed to completely eliminate paperwork from our lives, but I can certainly say that paper has stopped being a reason for mess in our house.
Today, I’m sharing with you a few steps that have helped me declutter paperwork in my house:
1. Spread Out All Your Paperwork In One Place
The first thing you need to do in order to declutter the paperwork is to gather every piece of paper lying around in your house in one place. Use a work station or a flat surface or just your living room floor to assemble all your paperwork on.
You’ll be amazed at the amount of paper lying in the many drawers and cabinets in your house, under the bed, on your work desk, in the closet, on top of the kitchen counter and in the junk drawers. You’ll find magazines, catalogues, bills, receipts, pamphlets, newspapers and mails that you never had time to deal with. Collect them all in the designated work station as quickly as possible.
2. Sort Into Categories
Now comes the step that requires the most bit of your time and efforts – sorting the paperwork. But before you get going, make sure that you have three large boxes labelled as ‘Keep’, ‘Trash’ and ‘Shred’. Now start picking the papers one by one and sort them into the categories they belong in.
Keep the important documents like your education certificates, birth certificate, social security cards, tax filing papers, will, medical records & scans, home & car insurance papers, mortgage titles, marriage/divorce records, loan statements, investments & bankruptcy records, contracts, licenses, latest credit card and bank statements, passport and other identity documents.
The Trash pile is for the papers that can be tossed straight into the garbage bin. Make sure that you don’t throw any item that contains your personal information straight into the trash. Throw away the old magazines, pamphlets, old receipts and utility bills, junk mail or any flyers you got at the grocery store.
The Shred box should have the trash-worthy items that contain your personal information. I have a crosscut shredder at my home to deal with the documents that I don’t want to throw straight into the trash. Paperwork like old bank statements, tax forms, old medical records contain information that can be used for identity theft and therefore should be shredded away before being thrown into the trash.
3. Organize The Remaining Paperwork
Now that you’ve trashed or shredded the unneeded paperwork, it’s time to organize what remains. Your Keep pile needs to be organized carefully as it contains paperwork that matters. If possible, digitize as much of your paperwork as you can. Most of your documents can be scanned and stored in a digitally secure way if you don’t have enough space to store their physical copies. This will make it easier for you to look for them when they are needed. You can use a hard disk drive or a Cloud service as a storage system for your digital files.

For paperwork that can’t be stored digitally, use filing system to keep them organized. I have a filing cabinet and a few folders to organize my physical mails and documents. You can use an organization system that works for you, but make sure that you don’t make it difficult for yourself to locate the paperwork.
4. Opt Out Of Junk Mails
Your decluttering efforts will have no meaning if you are unable to stop the new incoming mail right at the door. Opt out of any unneeded magazine subscriptions or promotional mails and opt in to receive your bills and receipts in a digital way. You can also opt for e-filing of your tax forms. Hospitals these days offer the facility of making your medical documents available on their online portals thereby eliminating the need to carry them in physical form.
5. Assign A Home To Incoming Mails
Now that you’ve decluttered the paperwork in your house, it’s time to create a system for on-the-spot handing of incoming mail. Keep a pretty little bin in the entryway of your house and trash away any unneeded mail right at the door. For mails that are important, keep a mail holder in your living room to organize them. Incoming paperwork that is super important should go into the filing cabinet as and when you receive it. You don’t want to go through the hassle of having to find the documents when you need them which is why it’s important to assign each of them a home to sit in.
It feels overwhelming to be drowning in paper clutter especially when digitization allows us to go paperless in many areas of our lives. I still prefer using paperwork when it comes to journaling or reading books, and I always prefer having physical copies of medical reports or scans. Although it’s not possible to let go of paperwork in its entirety, you can certainly prevent paper clutter and reduce its inflow by taking the above stated steps.
What other tips & strategies do you implement to keep paperwork to the minimum? Feel free to share it in the comments below or write me at hello@theaestheticabode.com.